|
|
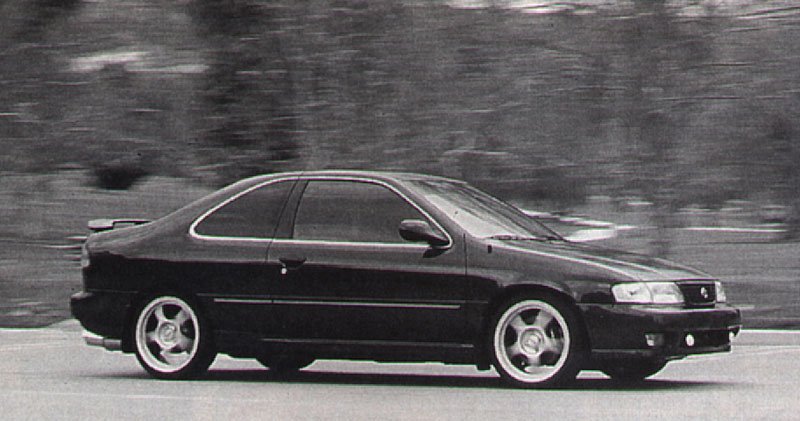
Sport Compact Car - June '97Project 200SX SE-Rby Mike Kojima [Put into HTML format by Ken Pratte] Street Survival in the '90s. PHOTOGRAPHY: Dave Coleman, Mike Stute Public highways are not a friendly place for a modified street car. Smog checks upon registration were just the start. Now we have OBDII smog systems which have wonderful features like encrypted ECU code and Flash ROM’s that hold any system failure code. Even the simple act of unplugging a sensor to check it with a multimeter can trigger a failure code in the ECU unless the factories procedure is followed to the exact letter. Already in California, automated roadside emission sensing machines are a reality. Situated on the shoulder of highway on-ramps these sensing devices use an optical sensor to measure emissions as your car drives by. Polluter citations are mailed out to those who exceed an arbitrary threshold. Moreover, those with failure codes stored in the flash ROM of the ECU must show proof of being cleared or you will not be allowed to register your car. Only factory scan tools are able to reset the ECU and erase failure codes.
Sound Orwellian to you? It only gets worse. Planned but not yet implemented are the more draconian rules of OBD-III which will have nice things like a GPS transponder where the government can log where you are going, where you’ve been, how fast you are going and where you keep your car! Hello to speeding tickets in the mail and quick and easy government confiscation of your ride! If this sounds unbelievable, believe it. Better register to vote if you want to do something about it. Your trick, killer, slamed, turboed 12 second ¼-mile machine is the target of other types of harassment, too. With the coming of age of the so-called Generation-Xer, the generation gap has reared its ugly head again. We don’t look, act, dress or think like the baby boomer’s and are getting blamed for everything from a slack economy to the increase of street violence. The clueless sensationalistic media doesn’t portray us in fair light, either. This prejudice some times makes drivers of modified sports compacts the target for unfair law enforcement attention. Unfortunately, modified imports are the some of the most visibly noticeable cars on the road. That head turning, dumped to the weeds, big rimmed, aerokitted, loud exhausted, thumpin' car of yours with racing stickers just screams "pull me over and give me a ticket." Does this leave the average street machine owner with no choice but to drive an econobox? Does it have to be slow? Does it have to look dorky? The answer to these questions is a resounding no! The secret is stealth, using a mixture of high tech parts, moderation and displaying the sleeper but cool look. With a little planning you can build a car that is still fun, practical and possible to drive to and from work everyday without getting smog tickets in the mail. The car will still have the ability to mix it up and win some legal racing ventures on the weekends with world class braking, cornering and acceleration while still looking good enough to turn the right heads. To be a little different we selected a Nissan 200SX SE-R in instead of the more common Honda for our sleeper ride. Since more parts are available for Hondas this represents a significant challenge. No matter what make or model your ride is, these ideas and principals can be carried over to your car. When attempting to improve your car's performance, there are two general rules that should be followed: First, you should keep in mind what you are tring to accomplish with your modifications, lest you work against yourself in your eagerness to have that cool new widget. Secondly, it is always a good idea to make modifications in the smallest increments possible. That way, if something goes wrong, or isn't working properly, you have a much better idea of which new part is causing the problem. Our first step in improving Project 200SX SE-R breaks that second rule. We are throwing a huge pile of new parts at the car, not simply in an effort to have lots of cool things, but also to save a significant amount of labor. If we were to modify the brakes and suspension in, say three or four steps, we would be duplicating many tasks, and making the installtion far more difficult. On the other hand, we expect the car will need some sorting out once it's back on the road. However, quite a bit of careful planning has gone into the selection of these upgrades, so if everything really was thought through, it should work quite well. Our planning follows. We have all seen, admired, ridden in or maybe even own super-slamed street cars. You know the type, on the bump stops, lower than a Super Touring car, bouncing, darting and weaving down the freeway, crawling over shopping center speed bumps, cutting grooves in the asphalt while shedding parts and making frequent stops at public restrooms. Contrary to what a lot of people believe, it takes a lot more than super slaming to make a car handle like a race car. Although super slamming can help handling by lowering the cars center of gravity and reducing aerodynamic drag by reducing frontal area, it can cause other effects that degrade a cars handling more than it helps. In fact, most slammed cars handle a lot worse than stock, maybe even dangerously. If you are tired of wearing down your tires every 5,000 miles, paying for too-low tickets, breaking stuff and having to wear a kidney belt, read on. If you just like carving the canyons, putting the hurt on the mid-life-crisis suffering owners of expensive "sports" cars or doing some weekend slalom racing or time trials, this story is for you.
Suspension
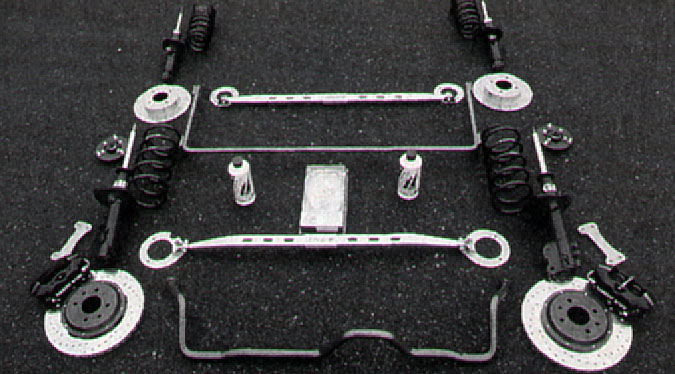
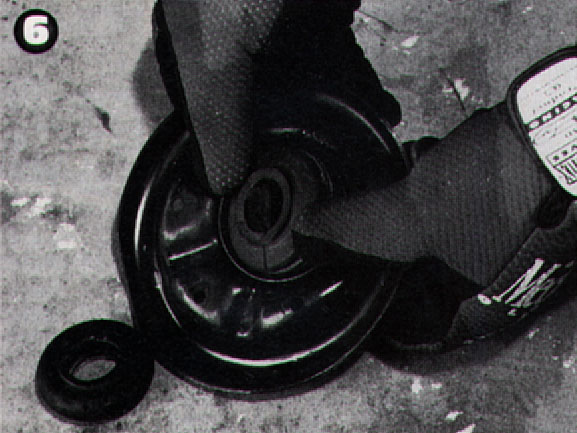
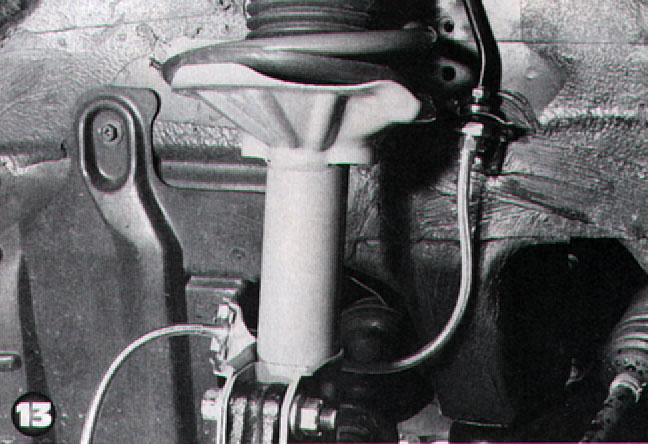
Lowering your car should be done with precision, high-performance springs from a reputable manufacturer. When you lower a car through shortened springs you are reducing the amount of suspension travel. High performance springs from a reputable manufacturer are carefully designed not to reduce your travel to dangerous or excessively uncomfortable levels. If your car is so low that it has almost no travel, the slightest bump will cause it to bounce and bottom out. If you bottom the suspension on any corner of the car you will immediately increase the spring rate of that corner to nearly infinity. Do this while cornering hard and it will cause a rapid rise of slip angle due to the sudden increase of load on that corner of the car. The end result is a loss of traction at that end of the car. If you really over-do it, harsh bottoming out when hitting bumps can even cause unplanned airbag deployment. Some people cut the bumpstops in order in an attempt to regain lost travel. The drawback to this is that it can make the suspension go into bind under bump conditions which can cause catastrophic overload failure and/or damage the shock valving, ruining the shock. You should never cut the bumpstops more than thirdof their total length. Lowering the car too much can make it impossible to realign. Proper alignment is critical for handling, even in a straight line, as well as being necessary to maintain any kind of tire life. If you lower the car too much the alignment could get beyond the factory range of adjustment. We used Eibach Sportline springs for the front and Proline progressive springs for the rear. Sportline springs are set for a lower drop (about 1.7 inches in our case) without excessive bottoming and are designed to keep the spring tight in it’s seat (cut springs can get so short that they can fall out!), while the Prolines lower the car around 1 inch and are designed for a smooth but sporty ride. The 200SX has large front wheel openings so a bigger drop in the front will help give a clean look. Normally, mixing and matching springs is not a good idea, but in the case of the 200SX, the Proline springs have the same spring rate as the Sportlines so the balance between front to rear is not altered. Eibach springs are moderately stiffer than the stock springs which helps reduce body roll and bottoming but not so stiff as to make your kidneys hurt, important for a daily driver. Most Eibachs are progressively wound which means that they are moderately soft for small bumps and slow corners but get stiffer when the heat is on. Eibach is a quality oriented company who has earned the difficult to get ISO9000 quality certification. Only very quality oriented companies can earn this sort of internationally recognized certification, so we can trust that the springs will be good.
Shocks
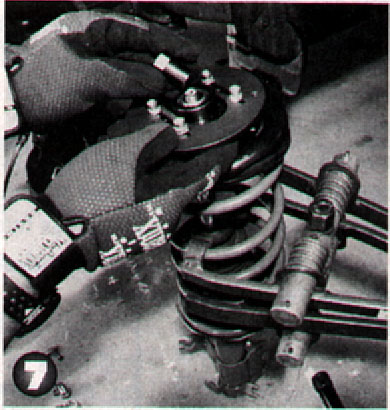
Shocks help resist roll in transient maneuvers. Contrary to popular belief, shocks do not resist roll in steady state cornering nor hold your car up. That is the job of springs and anti-roll bars. The springs suspend the car and the anti-roll bars help the springs resist roll by twisting. Shocks make the biggest difference when it come to providing a secure, stable feel of the car. A good set of shocks will make the car feel stable instead of floaty, reduce the bounce after a hard suspension-bottoming impact and give the car an on-the-rails feeling in quick transitions. Shocks make the biggest single impact in improving the driver’s feel. If you are going to install only one component to improve your cars handling, shocks would be it. For a car built for street or fun, adjustable shocks are the hot ticket. Set them up stiff for the weekend autocross, time trial or canyon run, set them soft for your daily commute. Adjustable shocks are also great for setting up your suspension to your personal preference or to a particular track. We used GAB shocks for our project. GAB produces very high quality adjustable shocks. Unlike some other shock companies, GAB puts the adjusting knobs where they are easy to get to, an important feature. GAB shocks also sport nitrogen pressurization to reduce fade and to improve shock consistency under extreme conditions. An advanced feature of GAB shocks is velocity sensitive valving. Velocity sensitive valving automatically reduces damping force under small but high impact bumps for a smooth ride but increases damping under slow shaft speed to reduce float on high speed undulations. This allows for a fairly smooth ride for a high-performance shock while allowing enough damping for high speed control. GAB shocks are also very durable. The SCCA/IMSA team that I often drive for uses GAB shocks exclusively. Under these extreme condition (3-12 hour endurance racing) the GABs can last an entire season unless they are damaged by a crash. Stock shocks and even some other famous high performance brands can wear out in one 12 hour race.
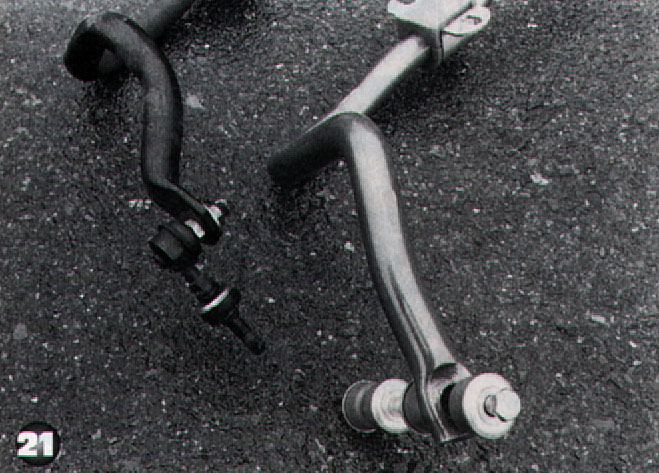
Anti-Roll Bars Anti-roll bars can also be used to help balance a car's handling by reducing understeer or oversteer. They do this by altering the amount of weight distribution under roll. By stiffening the anti-roll bar on one end of a car, the amount of weight transfer to the outside tire on that end of the car is increased. This causes a bigger slip angle of the tire on that corner of the car, causing that corner of the car slide out sooner. A car that understeers (front end slides out first in hard cornering) can be balanced by a larger rear anti-roll bar. A car that oversteers (rear end slides out first) can benefit from a larger front bar. Most cars are designed to understeer by the factory because this is considered to be the safest for inexperienced drivers. We will be shooting for neutral steer. Neutral steer is when both the front and rear tires slide equally under hard cornering. Neutralsteer provides the best cornering power because both front and rear tires are used to their fullest potential. The front anti-roll bar for Project 200SX was supplied by Stillen. On the outside, the Stillen anti-roll bar has the same 1-inch diameter as the stock bar. The stock bar, however, is hollow, while the Stillen unit is solid spring steel. This means a much higher amount of roll resistance in a package of comparable size. The Stillen bar also uses polyurethane for the mounting bushings which is much harder and more durable than the stock rubber bushings. Harder bushings allow the anti-roll bar to be much more effective by transferring the roll forces directly to the anti-roll bar instead of compressing the soft rubber first. For the rear anti-roll bar we turned to Suspension Techniques. The 200SX has no rear anti-roll bar from the factory (not an uncommon trait for production cars). The rear anti-roll bar will help to balance the stock 200SX’s propensity to understeer. The Suspension Techniques bar is 5/8 of an inch and bolts to holes drilled in the rear trailing arms of the suspension. Since neither bar is adjustable, we can wait and see if they will provide the balanced neutral steer characteristics we are looking for. If not, we will keep making adjustments until we are happy with the results.
Camber plates Correct camber can help your cornering power. Negative camber is when the tops of your tires lean inward. Positive camber is when they lean out. Negative camber can help grip by compensating for tire flex and body roll at the limit. When cornering at the limit, a tires tread tends to lift up off the road on the inside edge because of sidewall flex. Also during cornering induced roll, most cars suspension geometry causes the wheel to tilt outwards making the insides of the tread lift even higher off the road. Negative camber can help by keeping the tread flat on the road during cornering by making the tire lean into the turn. That’s why you see Super Touring and Indy cars with a lot of negative camber on the front wheels. On the downside too much negative camber can kill your tire wear, hamper braking, causing wheelspin on acceleration and make the car tend to wander on the freeway. Since Nissan didn't make any provisions for camber adjustment, we turned to Stillen camber adjustment plates for Project 200SX. These are CNC machined from billet aircraft aluminum and anodized an attractive blue color. They allow 4 degrees of adjustment from inside the engine compartment. They also feature aircraft type spherical bearings to hold the strut tops, eliminating the factory squishy rubber bushings. The stock rubber deflects under cornering loads throwing the camber off. Although, the lack of rubber isolators translates slightly more noise and vibration into the chasis, the ride doesn't deteriorate too much. The razor sharp feel that these plates provide more than makes up for the slight deterioration in vibration isolation. Some drivers may even prefer to feel the vibration as it helps give the driver better feedback of the road conditions. The Stillen plates also feature a scale eteches into the top of the plate which allows for easy visual confirmation of the alignment settings. These plates allow quick, easy adjustment of the camber so you could have a maximum tire life setting for commuting and within minutes adjust to a weekend warrior setting for competing.
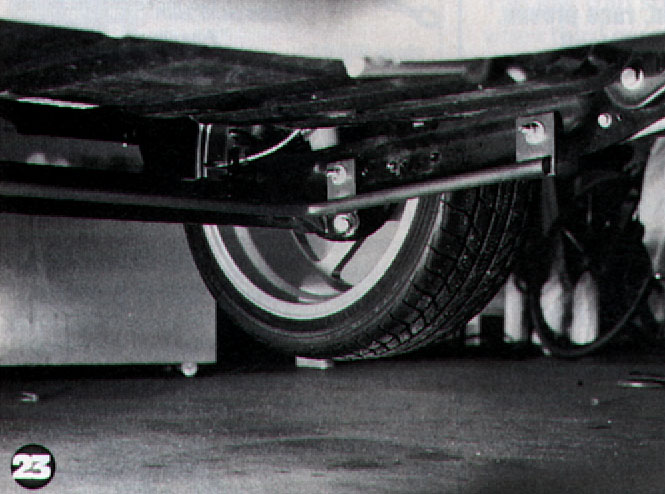
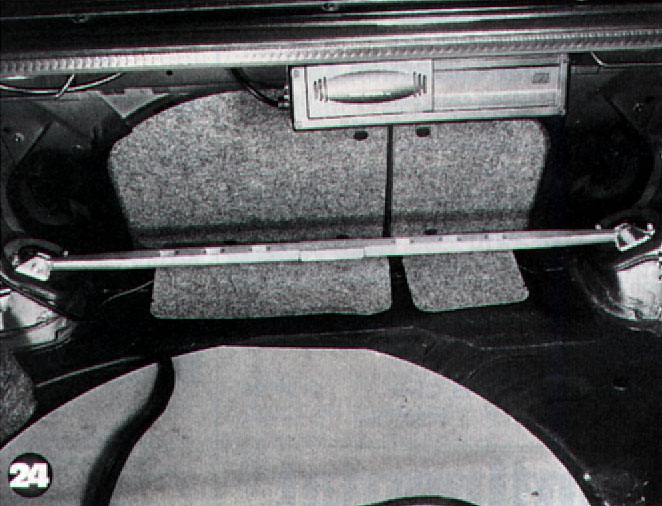
Stress bars Short of a tube frame, a carbon tub or a not-so-practical, 8-point-roll-cage, stress bars are the most cost-effective way to stiffen up your ride’s chassis. Stress bars stiffen the chassis by tying the shock towers together, keeping the suspension geometry from changing under load. If no one make a stress bar for your car, one can be fabricated from tubular steel for a fairly reasonable price. The trick, CNC machined, aircraft aluminum billet front and rear stress bars on project 200SX were made by Stillen. These bars are extremely ridged due to the high grade of materials used and excellent design. They have a very high tech racy look and are a nice finishing touch to any engine compartment or trunk. The stress bars tightened up Nissans already rigid body giving it a bank vault like quality. The difference in turn-in and cornering stability could actually be felt.
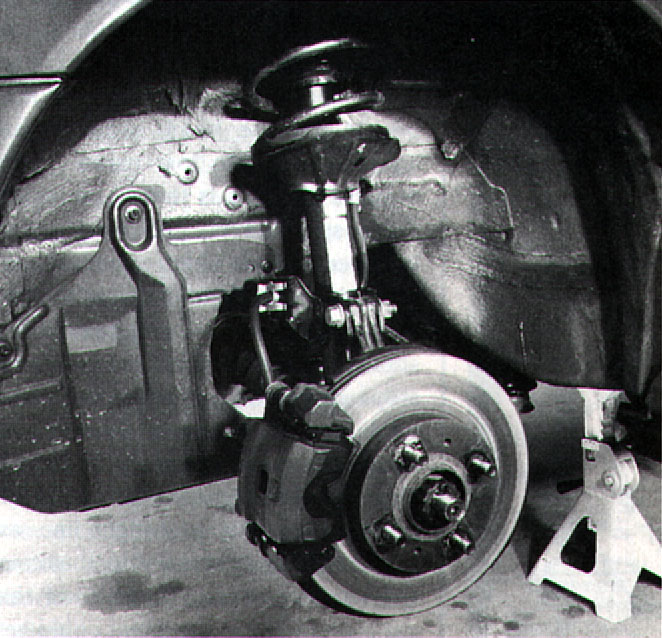
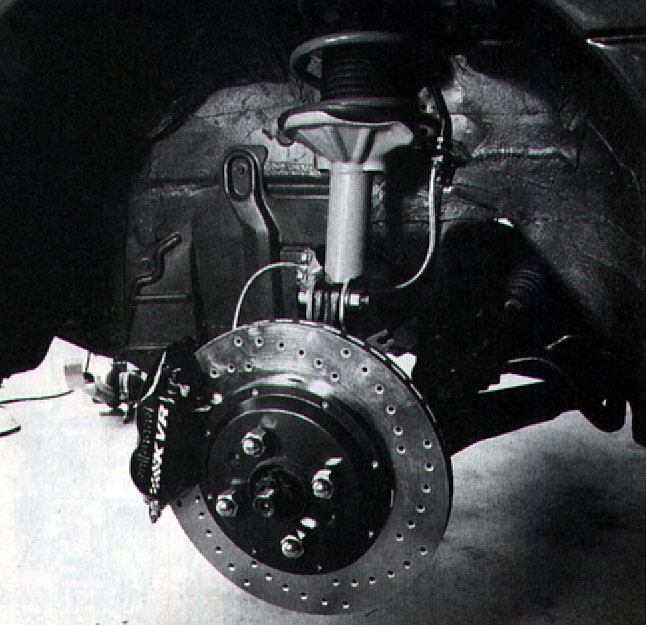
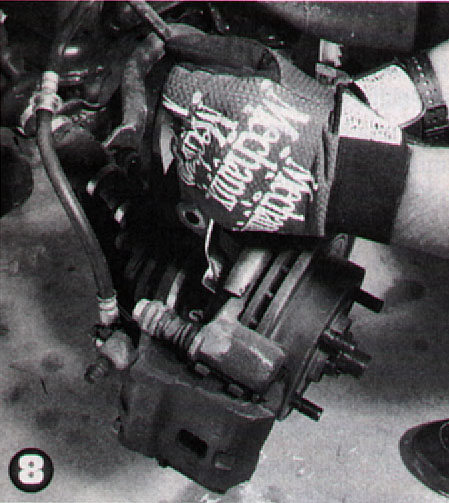
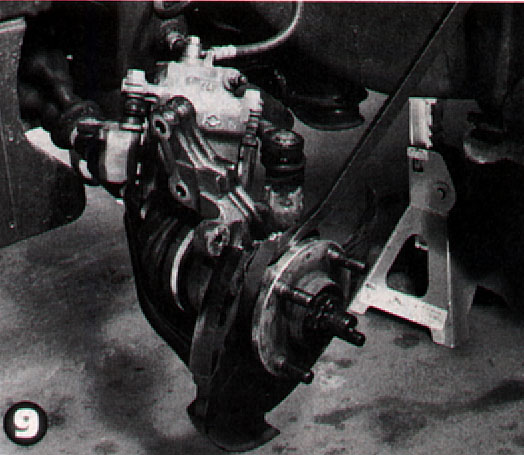
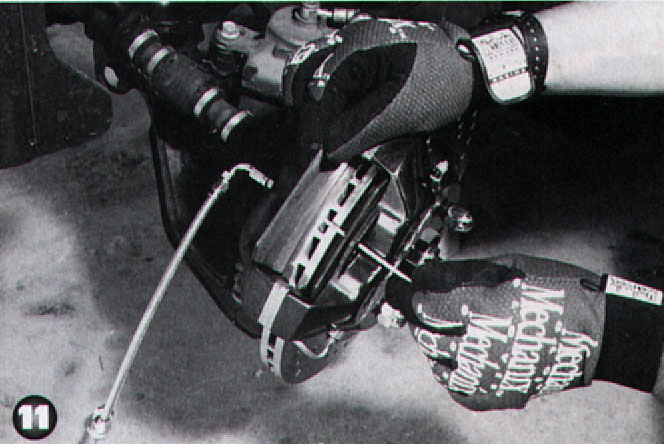
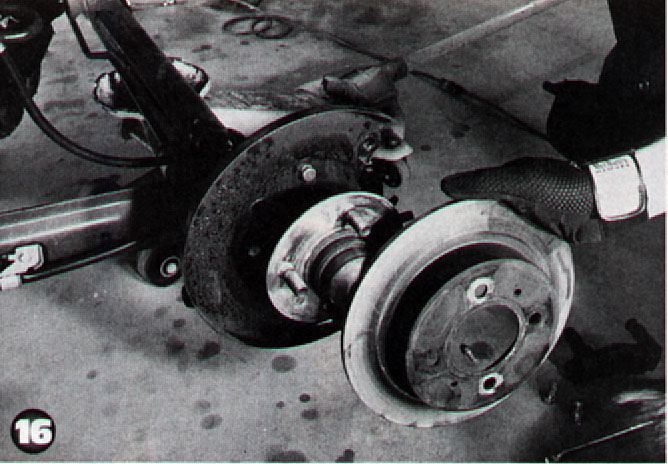
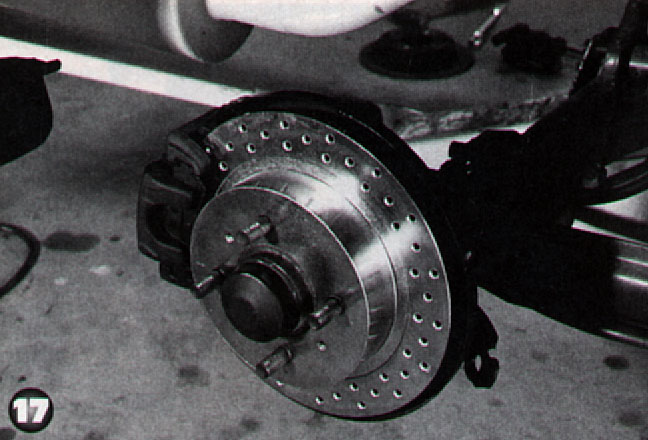
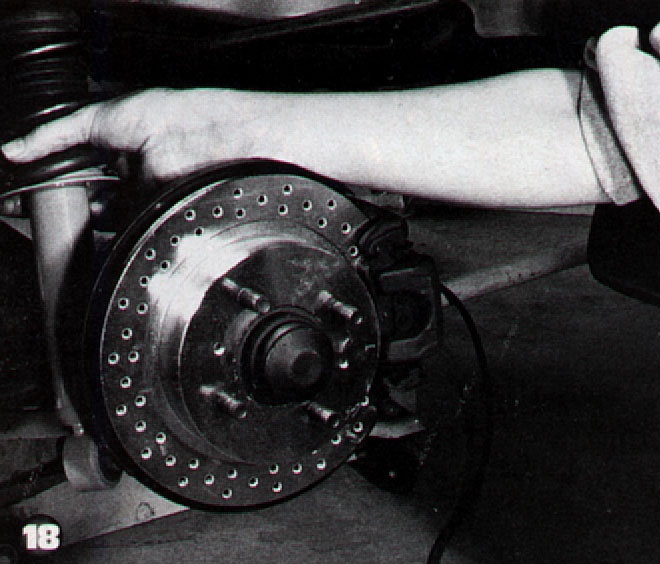
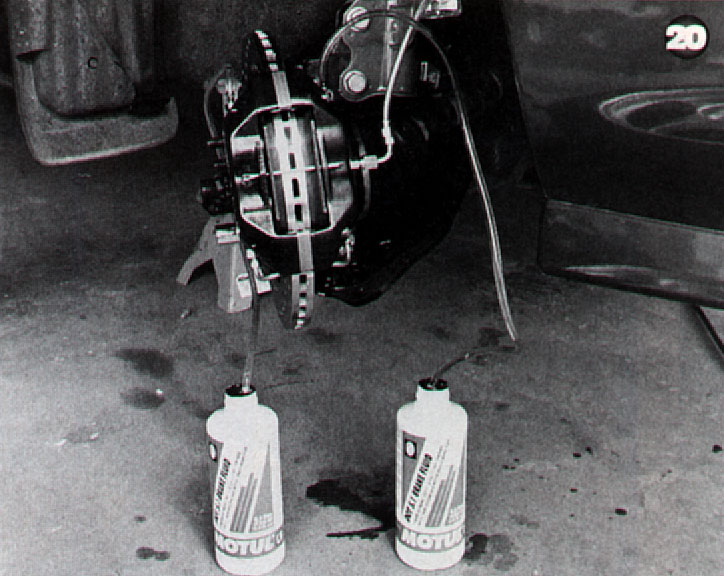
Braking Performance SMC products has wild, big brake upgrade kit for 200SX that goes way beyond the typical cross-drilled stock sized sport-rotor upgrade. The kit consists of Willwood four piston calipers with adapter plates, 11.7 inch (up from the stock 9.6 inch), cross-drilled, vented, forged steel front rotors with alloy top hats, carbon ceramic brake pads, braided steel brake lines, Motul brake fluid and cad plated, cross-drilled sport rotors for the rear. The visual impact of the big rotor and aggressive looking caliper with the anodized bits behind the 17 inch rims is worth the price alone. Since more than 80% of the braking on a typical front driver is done by the front wheels, most of our efforts for now will concentrate on the front brakes. The 4 pistons in the front caliper offer more piston area for greater, more even clamping force on the brake pads while the all aluminum construction is much lighter than the stock single piston cast iron caliper. In fact, despite the drastic increase in size, the SMC package shaves about six pounds of unsprung weight off each front corner. The Willwood caliper is also physically bigger allowing the use of bigger brake pads with more surface area. The bigger rotor gives greater swept area allowing for better cooling as well as more heat-dissipating mass. Cross-drilling of the front and rear rotors allows the brake pad material vaporized by hard braking to escape. If trapped, this vapor can cause the brake pads to hydroplane on the rotor. This is the cause of one type of brake fade. The cross-drilling can also allow water to escape from under the brake pads helping braking in rainy conditions. The carbon pads in the SMC package are very risistent to heat and vaporation. There are also very soft and maintian their softness and frictional properties over a wide range of temperatures. Traditional racing brake pads are made of sintered metals. These only begin to grip at high temperatures and the abrasive metal pads quickly wear out rotors. Your first few stops in the morning or after cruising down the freeway for a few miles can give you a rude surprise. Traditional racing brake pads are also very noisy, and require a tedious and tricky bedding-in procedure. Bedding-in causes the binder material in the pad to boil away in a controlled manner. Unbedded racing pads have the binder boil off during their first hard use allowing the pad to hydroplane on the rotor. This is called green fade. These traits make traditional racing pads unsuitable or even dangerous for street use. Most carbon pads do not require bedding. Carbon pads are fade resistant enough for Indy car or Formula one use but still function well on the street even for cold stops. Most carbon pads are easy on the rotors and are fairly quiet. These properties make carbon brake pads the ultimate street or racing brake pad Stock rubber brake line swell under the pressure of braking. This is wasted force that could be applied to the brake pads. The SMC kit comes with braided steel, teflon covered brake lines. The teflon liner on the outside of the braided steel prevents dirt from getting into the stainless steel mesh and wearing away at the braided material when the lines flex. The liner on these lines is clear, so they look like normal braided brakes line from afar. The main advantage over the factory rubber lines is that they do not swell. This results in a higher, firmer brake pedal with improved feel and modulation. Braided lines can make a night and day difference in how your brakes feel. Motul brake fluid also has fairly remarkable properties. In racing IMSA and SCCA sedans it used be standard operating procedure to have to bleed brakes everytime the car was driven on the track for more than just a few laps. This was due to the extreme temperatures causing the brake fluid to boil. The boiling fluid is full of bubbles which are compressible and makes the brake pedal mushy, even to the point of going to the floor. This is another type of brake fade. I believe no other fluid even comes close to Motul. Motul has a very high boiling point and is resistant to moisture absorption, a phenomena that can drastically lower a brake fluids boiling point. As we mentioned earlier, we expect some sorting out of the suspension and braking systems will be necessary with this many changes. In our next installment, we will put everything mentioned above to the test, and see what fine tuning can be done.
Reprinted with Permission |