Replacement Photos:
SR20DE Water Pump
![]()
Replacement Photos:
SR20DE Water Pump
Say Where?
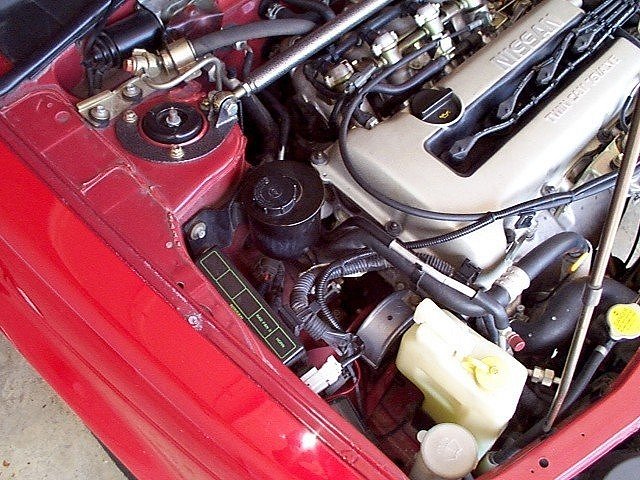 |
As you locate the water pump buried below the bundle of belts and hoses on the passenger side of the engine, you may question your sanity in performing this job. The belts, power steering reservoir and cooler, and right motor mount must be removed and re-installed during this procedure. The cheap and experienced will save $200-250 in labor. |
 |
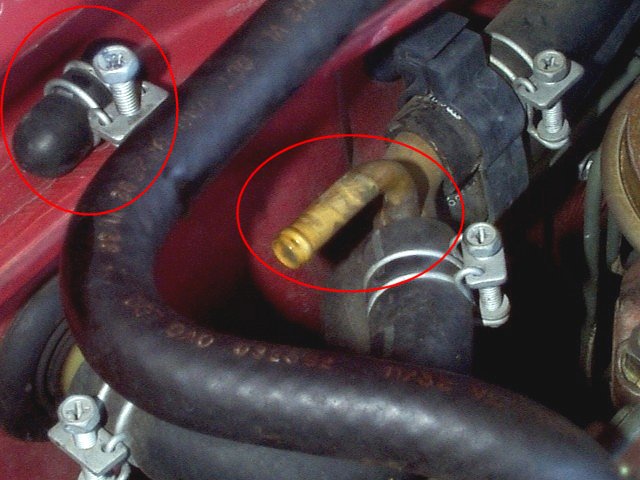 |
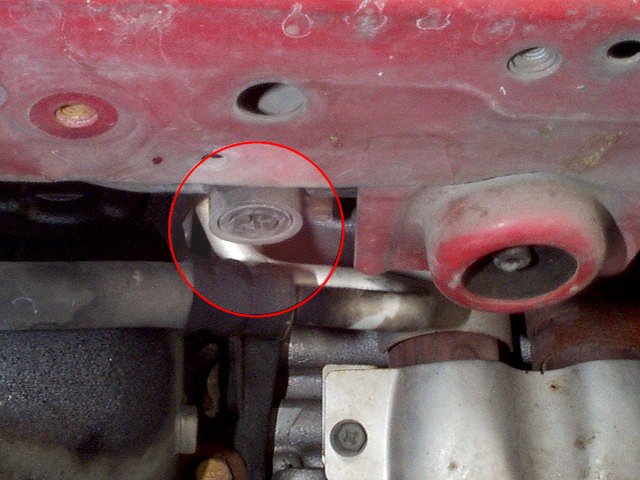
Four caps and plugs must be removed in draining and bleedling the cooling system. This is the rear bleeder, with the cap perched on the firewall ledge to the upper left. |
 |
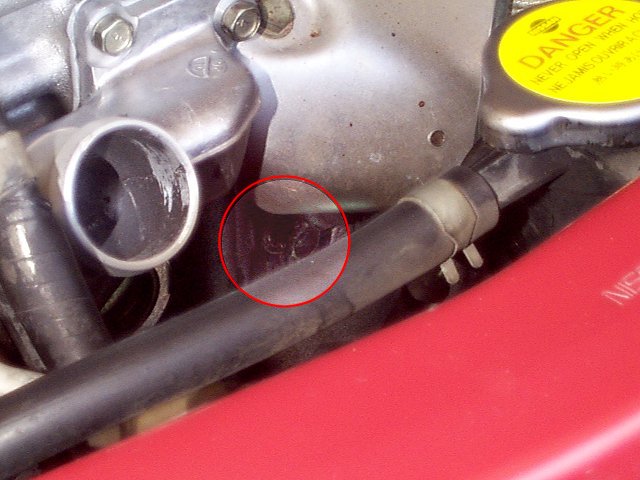
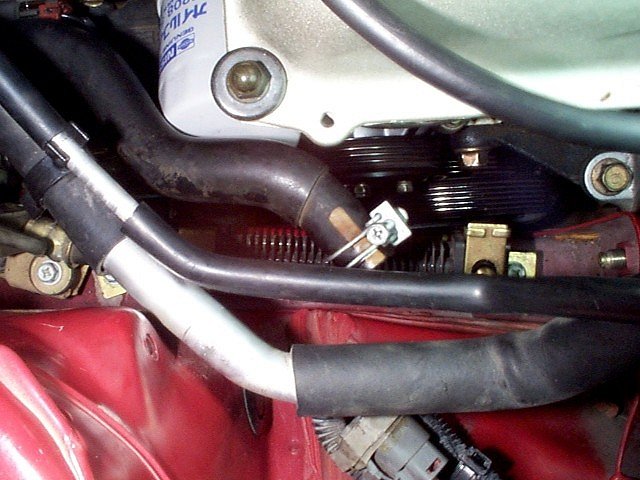
The front bleeder plug is in the center of this image, to the upper right of the thermostat housing as indicated by the gold label. |
 |
The engine block drain plug is located on the front of the block between the dipstick and the exhaust manifold downpipe. The coolant hose is removed for easier viewing. |
 |
The radiator drain plug is easy to find toward the passenger side. Use a big Phillips screwdriver. |
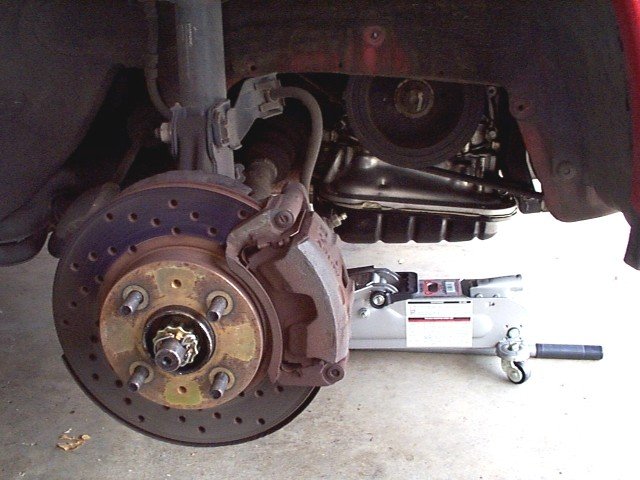 |
The accessory drive belts are visible through the right wheelwell with the splash shield removed. Notice the Stillen/Brembo brake rotor - save your money, buy bigger wheels, and do the AD22VF brakes. |
 |
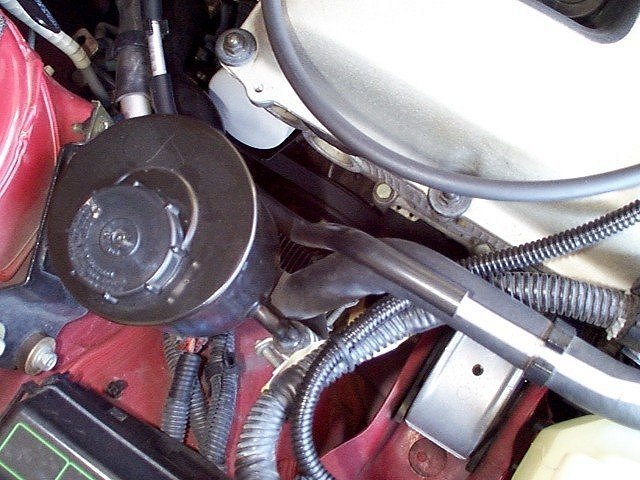
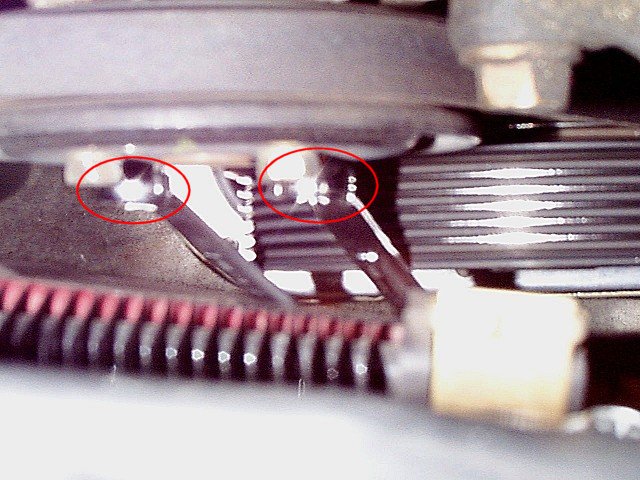
Peering up through the drive belts you can barely see the water pump pulley to the upper left of the crankshaft pulley. How will you reach up in there? |
 |
I say again: how? |
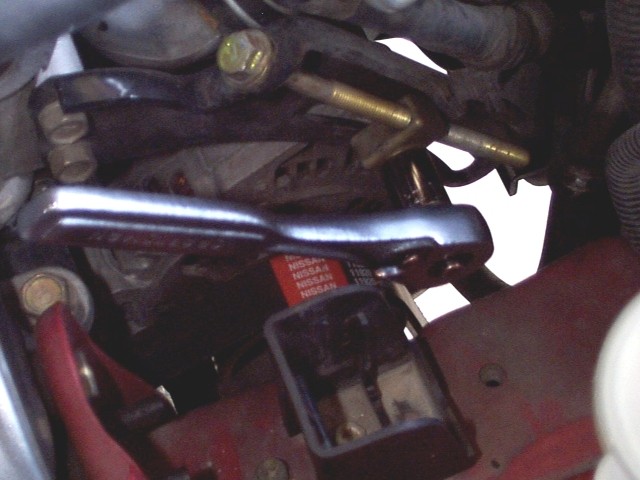 |
You continue by removing the two drive belts. The front one drives the alternator and air conditioning compressor. That's a Craftsman 3/8" drive ratchet and 12mm socket waiting for my next twist. |
 |
The rear belt drives the water pump and power steering pump. With the belt still on, I squeezed two 10mm wrenches together in a trick to remove the pulley bolts on the water pump. |
 |
The power steering reservoir has been removed, revealing the fins and hose fitting of the power steering cooler. This piece must also be removed to reach the water pump. |
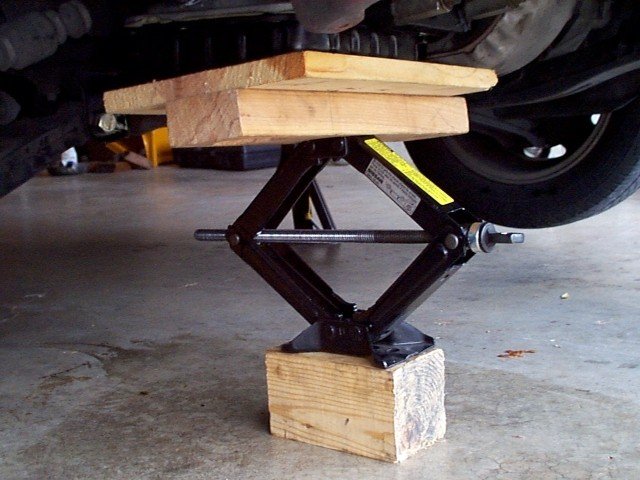 |
I used the factory scissor jack with a wood plank and blocks to support the engine beneath the oil pan. This jack offers much better control than a hydraulic floor jack. |
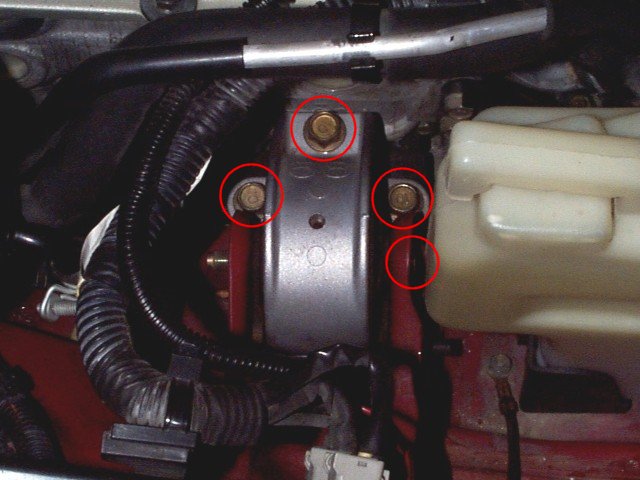 |
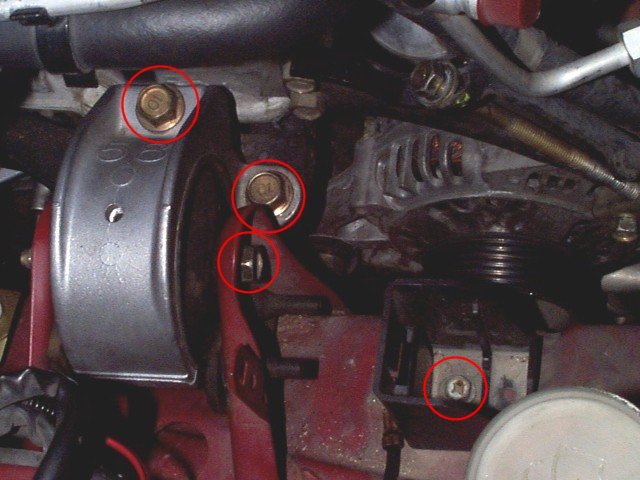
The right motor mount is secured with four bolts: three into the engine and one through the insulator. The mount must be removed to allow raising the engine to increase access to the water pump. |
 |
The coolant reservoir and seat must be removed to allow access to the motor mount insulator bolt. The seat still remains in this image. |
 |
These components must be removed to reach the water pump. Clockwise from top left: steering reservoir, steering cooler, right motor mount, water pump pulley, new water pump. |
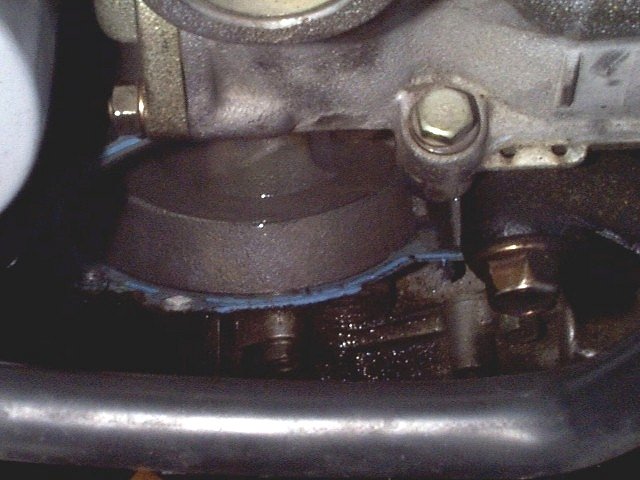 |
Water pump removed! The gasket material on the mating surfaces of the pumping chamber must be scraped away before installing the new pump. The timing chain tensioner housing is to the upper left. |
 |
The original water pump accumulated plenty of rust over five years, 106K miles, and two coolant changes. I didn't expect this much corrosion produced by a bath of distilled water and Prestone. |
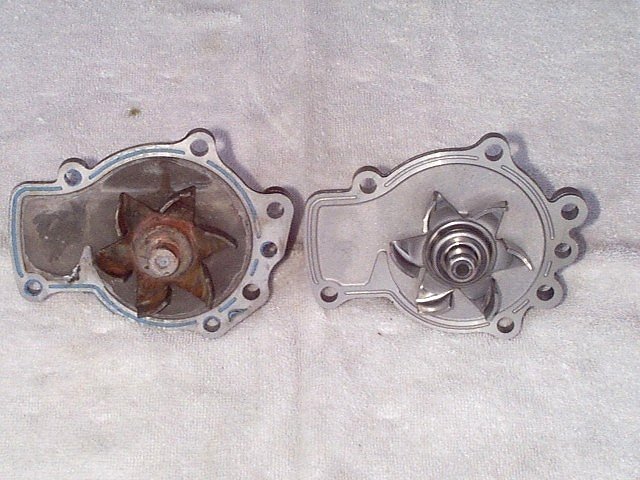 |
The interors of the old and new pumps are compared here. A different supplier produced the replacement part. I hope the new pump stays looking good much longer than its predecessor. |
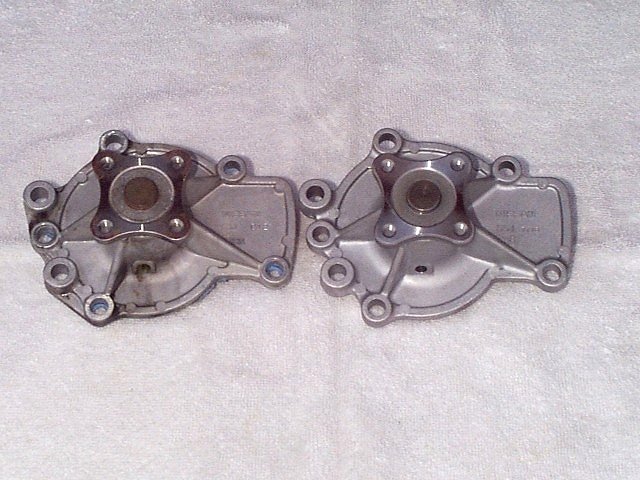 |
This exterior comparison reveals deposits left from coolant dripping from the bottom weep hole of the old pump. It looked worse before I cleaned up the pump for this image. |
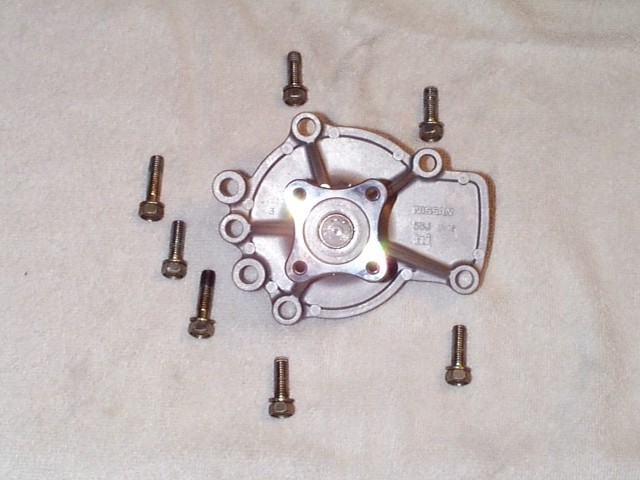 |
Not all of the pump bolts are identical. Two on the left are slightly longer because they must also secure the power steering pump bracket. Lay them out in sequence during removal. |
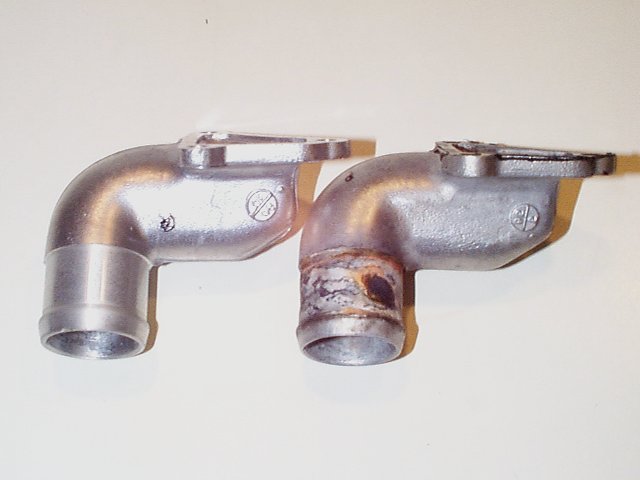 |
In an unrelated procedure, I replaced the water outlet after discovering another minor leak. That wasn't the only thing I found. |
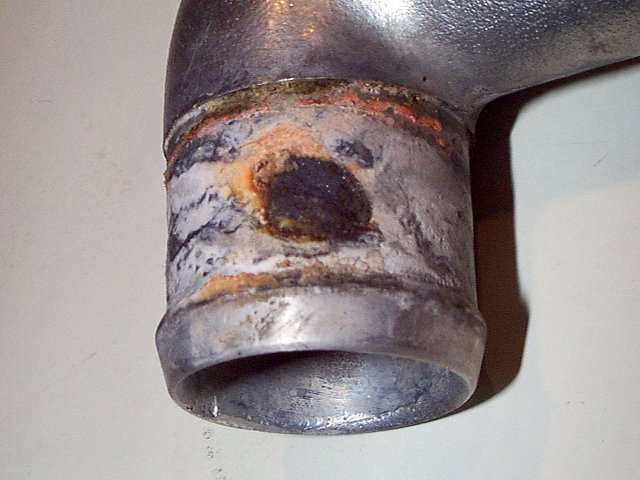 |
What's this? The outside of the hose junction is badly eaten. The dark spot is a recessed patch of very fine oxidation which easily rubbed off on my fingers. |
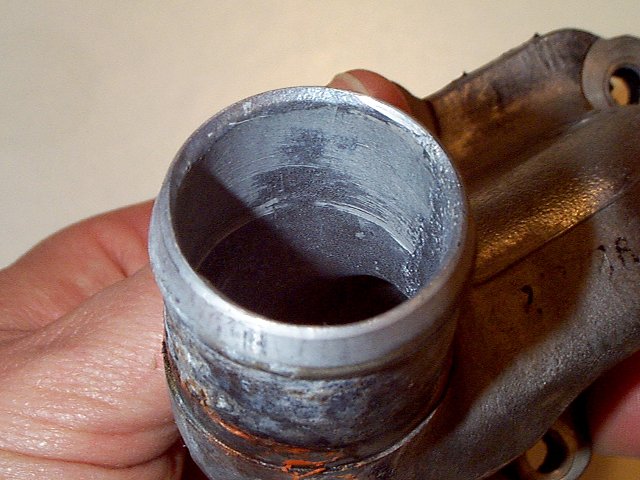 |
The inside of the outlet is strangely and deceptively clean. A suspiciously dark area exists just beneath the outer patch of oxidation. |
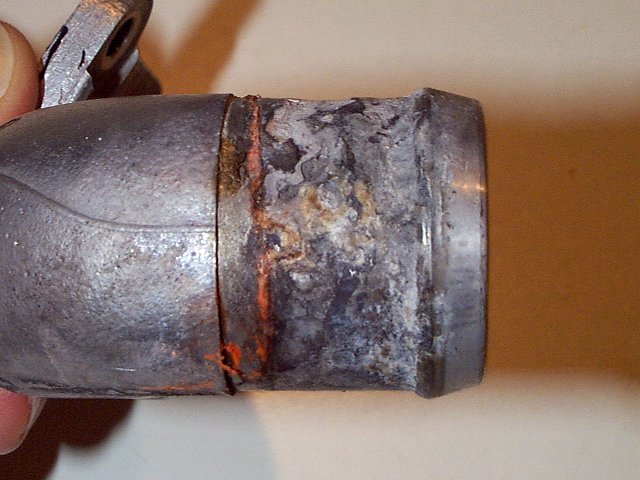 |
More corrosion. The orange stain is where the Prestone Extended Life seeped through and dried. The factory wire clamps didn't do the job. I've replaced them with band clamps. |
![]() Water Pump Procedure
Water Pump Procedure
![]() Rick's SE-Rious Procedures
Rick's SE-Rious Procedures
Original material is the creation of Rick
Zotz, 1999, 1998, 1997, and has been contributed to SE-R.net.