![]()
|
![]() Comments & Pictures by Shell Black
Comments & Pictures by Shell Black
Energy Suspension Install:
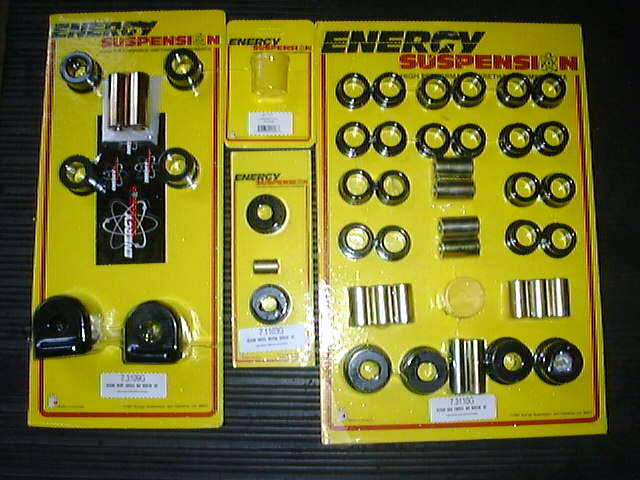
There are three separate kits that were installed by Courtesy Nissan on my '91 Classic. One kit [7-3109, $41.95 List] was for the front suspension (far left in the picture), one kit [7-1103, $7.30 List] for the shifter (center bottom of picture), and one kit [7-3110, $83.95 List] for the rear suspension (far right in the picture). The kit center top is extra lubricant for the install - just in case. Other kits available from Courtesy are the Front Sways [7-5115G, $20.95] and the Rear Sways [7-5116G, $36.70].
The whole install took my mechanic 8 hours to do. I think with the right tools (torch, air wrench, press) two people could handle this job in 5 - 6 hours. One person to take off and install the parts while the other works on removing the old bushings.
Front Suspension Install [Kit # 7-3109]:
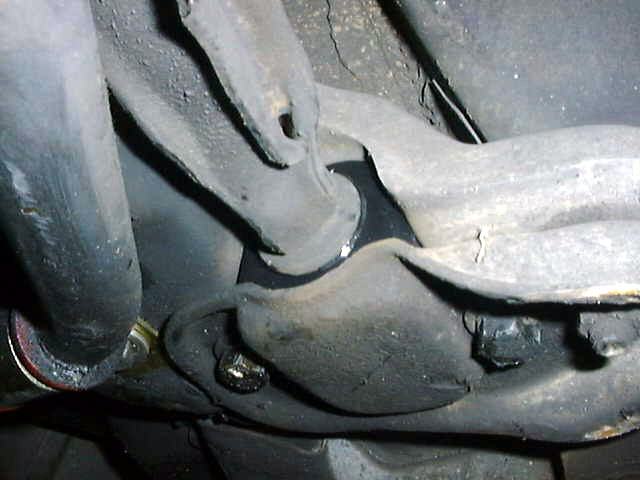
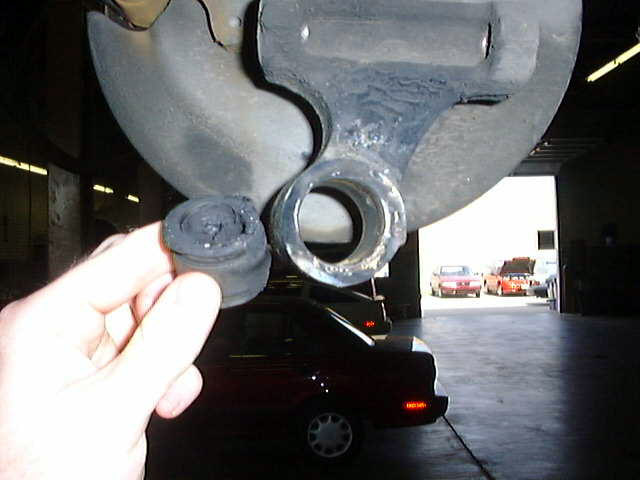
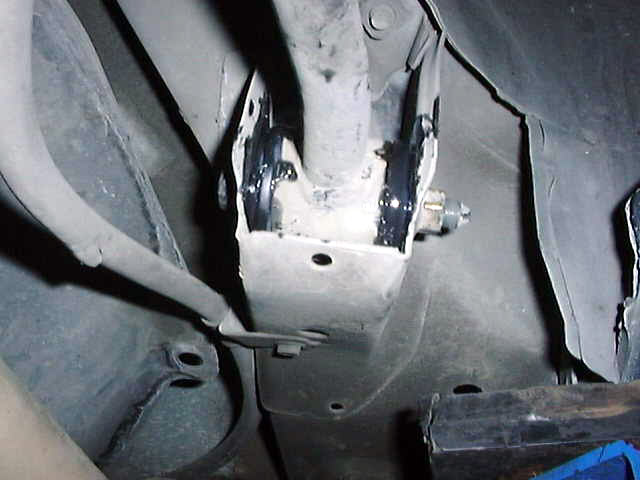
Here is a pic of the larger bushing that fits on the rear section of the transverse link which is sandwiched to the front suspension member by the compression rod clamp. You can also see were the Suspension Techniques Sway is hitting the chassis for reference. The Energy Suspension bushing is the dark shiny blob.
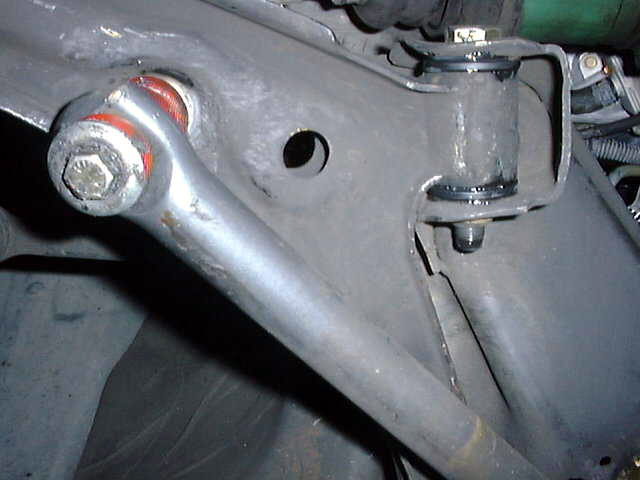
This is the hardest part of the install. The remaining bushings for the front suspension are in the front part of the arm of the transverse link. The rubber must be torched and knocked out before you can put in the new bushing.
With the old bushing burned out, the new bushings is in place.
Here is the old large front bushing next to the old shifter bushing.
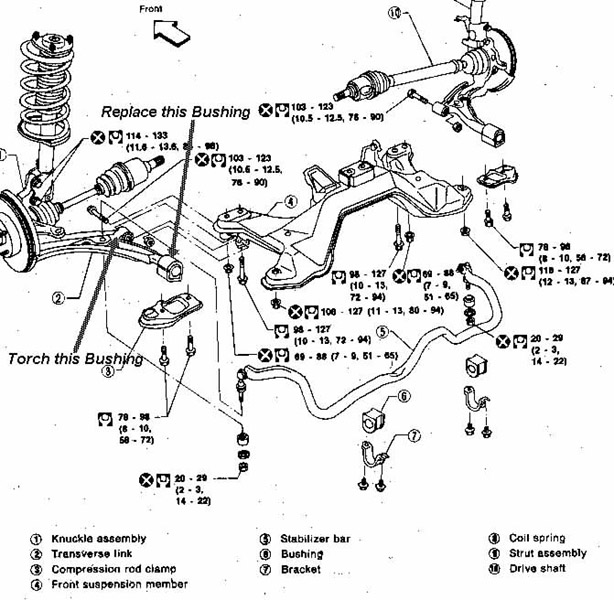
Lost? Here is an "annotated" service manual so you can follow the above. Look for my arrows and extra large italicized text!
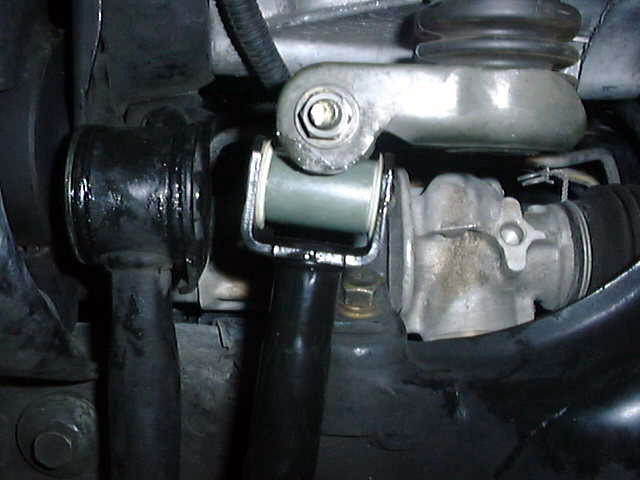
Shifter Install [Kit # 7-31103]:
You want to eliminate the play in your shifter? My short shifter was full of side-to-side slop. Not any more! On the right is the new control rod installed. The gray barrel dead center of the pic had a bushing that had deteriorated allowing the control rod to "rock" on the connecting bolt side to side - thus the "slop" on the shifter. There is no replacement bushing available, you have to replace the whole rod which goes back to the bottom of the shifter. Nissan part 34103-53J00 "Rod Assembly"– list $44.76, w/ SE-R discount $33.57. On the left you can see the Energy Suspension bushing installed on the support rod (Energy Suspension / Courtesy Nissan part # 7-1103 List $7.30 – cheap!). I can not tell you how much of a difference this had on the shifter. It was like night and day. The shifter feel is so positive and direct, notchy and precise. I catch myself waiting a half a second to make sure I’m in gear before letting out the clutch (the throws are so short and tight)! "As close as you can get to a race car..." as the Courtesy Nissan mechanic put it. It is the best money spent on the car in quite a while because I can enjoy the upgrade 50 times a day just driving around and it is a very easy install compared to the suspension.
Rear Suspension Install [Kit # 7-3110]:
With the lateral arms and the trailing arm off, the bushing in the knuckle is going to have to be torched out. There is no way to press it out. The knuckle is suspended by the strut and sway bar.
The bushing on the knuckle burned out. Careful, watch those brake lines!
Here are the rear lateral arms and trailing arm back on the knuckle with the new bushings.
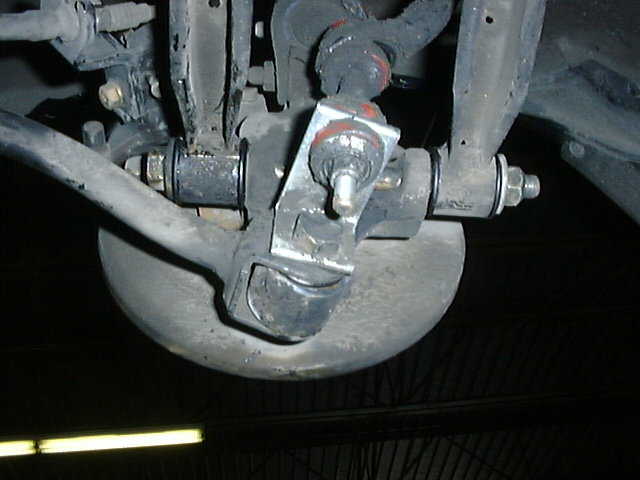
Here are the lateral arms with the new bushings back on the chassis.
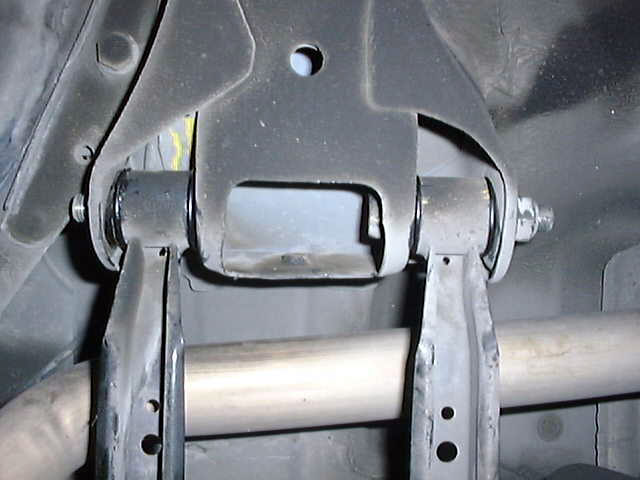
Here is the trailing arm attached to the chassis with the new bushing.
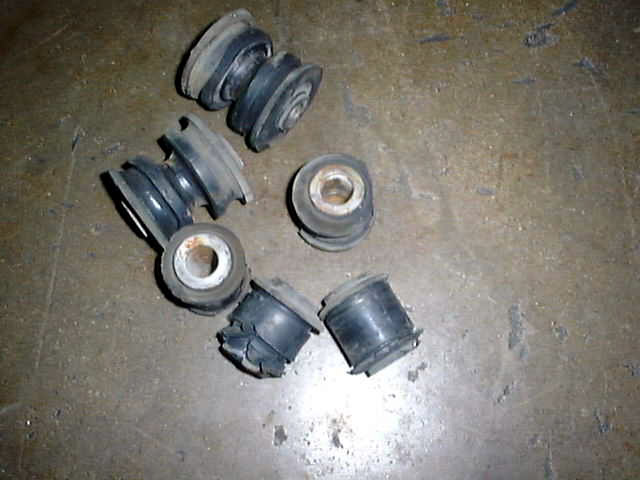
Here are the dead bushings off the rear suspension.
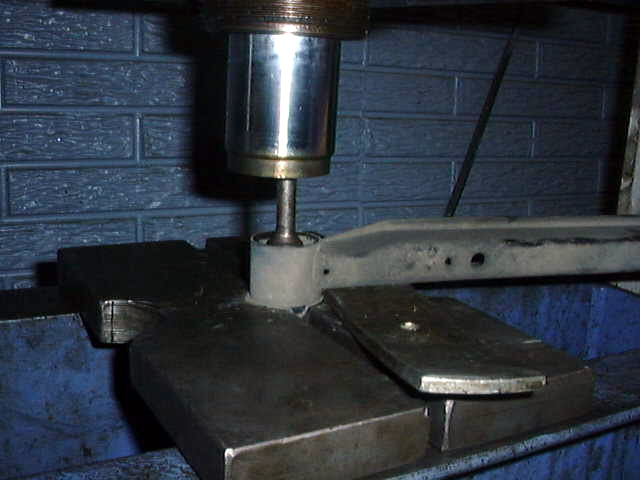
The press at work pushing out the old bushing on a lateral arm – very handy for this job.
The alternative method – torch it (All usual warnings apply)! Get the bushing on fire and let the rubber burn for a bit and soften up. Then you can use a press or an air hammer and punch the bushing through.
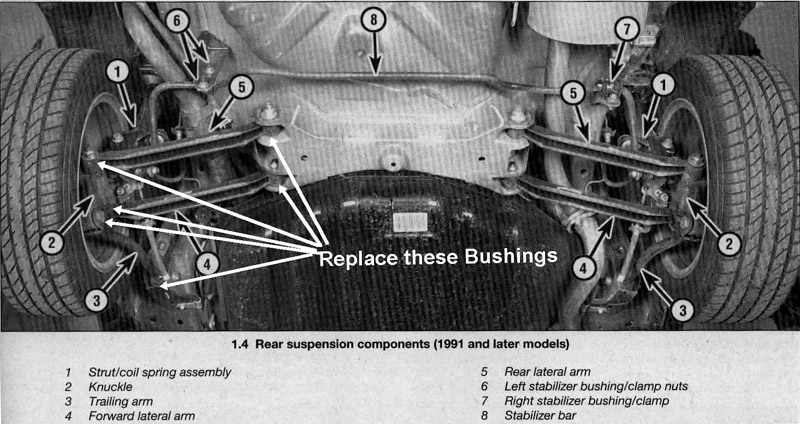
Lost (again:)? Hear is a scan of the rear suspension with all the parts labeled and drawn out.
Driving Impressions:It was not until the next day that I had an opportunity to test the new setup. I drove out to a secluded area (Wyngate?) known to Jeff Naeyart, Tim Boles and a few others in Plano Texas. Basically it is a set of streets that look to be laid out for a residential area that never went into construction. You have a three 90 degree turns and one very long two bend sweeper that makes the "loop." After doing some low speed runs to check for police, traffic, and crap on the road, I started picking up the pace. Some back to back 70 mph+ runs felt too good with just a hint of drifting. OK, time to put on the Schroth harness and really push it! I made a set of runs in both directions well over 80mph. This resulted in a linear four wheel drift. This is fun! After multiple laps on the loop I had brake fade for the first time on my B13 brakes. Time for a break to think of what I had learned.
The setup makes you feel that the whole suspension has been tightened a notch. The new bushings have eliminated a lot of the "wiggle" you normally feel during dramatic weight transfer. Usually on a high speed turn you would have the weight transfer from the initial turn-in with a result earning that uneasy feeling in your stomach as the car settles for the sweeper. Now you have a more linear transfer without as much "squat & catch" on the transfer. Keep in mind my original bushings were 104K miles old – your results may vary! I’m running 205/45/16s, Tokico/Eibach combo, ST Sways, Stillen camber plates & STB. On the lower speed 90 degree turns the rear just follows the front as you try not to plow by modulating brake, throttle, and speed.
When casually driving around town you are not going to notice much of a difference, especially in a straight line. I can definitely see auto-crossers and road-racers benefiting from the bushings because of more predictable weight transfer and crisper reaction. With hard cornering, I think you will do a better job keeping your alignment tight and your tire patch on the ground.
![]() Steve Hum writes:
Steve Hum writes:
After playing with different combinations of Energy Suspension and stock bushings for the stock front and rear swaybars, I finally have a combination that appears to work well. At least for the B13 SE-R.
IMHO, putting the full Energy Suspension bushing set on created way too much understeer. The combination that appears to work the best is Energy Suspension bushings on the rear bar and front outer links, with the stock center rubber bushings on the front swaybar. This combination creates a balance that has just a touch more understeer than the stock setup, but has noticebly less body roll and quicker response. The initial turn-in softness that I originally felt is mostly gone, as are the nasty vibrations that I was getting in the steering with the full ES set.
I've also been able to tune out the understeer with 2 psi more pressure in the front tires.
![]() Ken Nord writes:
Ken Nord writes:
Hint: To remove the Energy Suspension supplied grease, use WD-40 or any petroleum based grease and a rag. This will take it off easier than anything else including carb or brake cleaners. Also if you have a squeek do _not_ use WD-40 or petroleum based grease to get rid of the squeek. It will just remove any of the remaining Energy Suspension supplied grease.