![]()
|
Ultimate SE-R Engine Detailing
By Shell Black
Ahhh, the smell of engine degreaser! I felt compelled to write this quick article after the last couple of Texas Rallies. Many people have asked for the trade secrets, so here they are. First of all a disclaimer: Engines were not meant to go swimming. You run the risk of damaging sensitive electronics and sensors when exposed to liberal amounts of water and engine degreaser. I definitely have learned through trial and error what to prep on the engine. Before I knew better I fouled spark plugs and ignition cables. Thank goodness for the Consult (O2 sensor) to help us with the not so obvious things. If under-hood beauty is worth the risk to you, keep reading.
The next thing I want to set is expectations. If you have an "northern car" that has seen a few too many winters, engine degreaser will not repair rust. On a "southern car" I have seen huge progress by many individuals who have taken the plunge on detailing their engine bay. The competition has definitely "stepped-up" at recent rallies (yes I noticed!). My car is a '91 classic with 113K miles - original engine. Regular engine detailing (about once a year or whenever the Texas group gets together for a rally) has made this a relatively simple job. I feel once a year is plenty to keep the grunge, sludge and buildup in check. To prep for a rally I only spend about 1-2 hours on the engine, it is simply maintenance at this point. If you have never detailed the engine and you have a lot of build-up, it may take you two to three times this long to get the results you are looking for.
Some "likes" and "dis-likes." I am not a fan of "Armor All" type products on the hoses (or the interior for that matter). I feel it just attracts dirt, making your job harder next time. I tip I picked up at the last Texas Rally that I liked is using Mother's aluminum polish on the AC and compressor lines. I have not tried it but I would assume "Brasso" metal polish would work just as well. A couple of benefits from cleaning your engine; it will run cooler and make it a lot easier to work on your engine - your mechanic will love you!
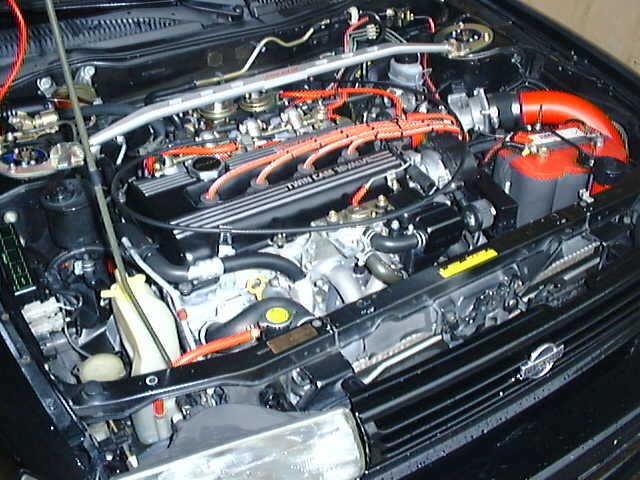
Let me step you through the job of cleaning the engine as I get ready for Texas Rally VI:
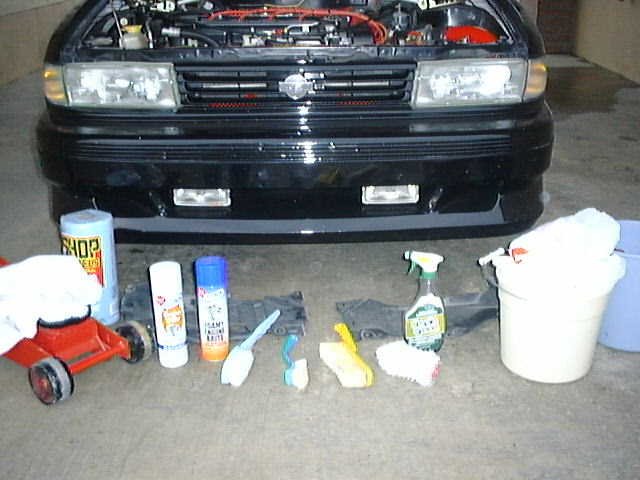
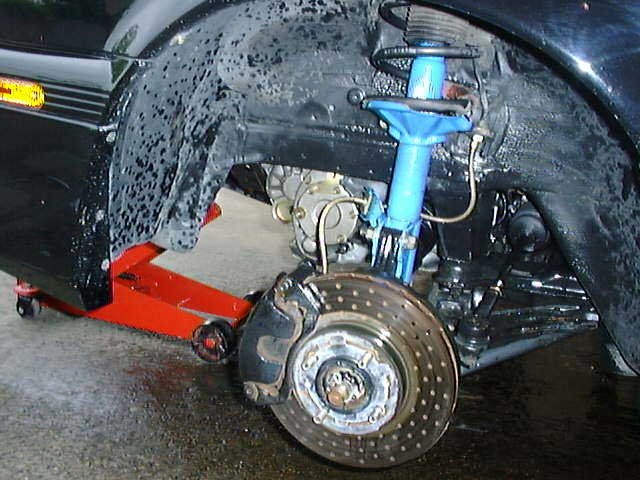
What I use to detail the engine bay. Notice the two splashguards have already been removed from the front under-carriage to get better access the engine. I use "Gunk" brand Engine Brite underneath the car because it shoots in a stream and Foamy Engine Brite for the top of the car. I will easily kill both cans on this job - you might need more. Notice the assortment of brushes. This will help you depending on the space and the reach needed to get to the heavy dirt. The Simple Green is sprayed directly on the brush. The jack is used to raise the car to pull the wheels and have better access to the sides and underneath of the engine and tranny. While you are at it, clean the shocks and inside off the front wheel rims. The engine is already warm from driving to the car wash. You want the engine warm, but not sizzling hot. Let the "Gunk" sit for 5-10 minutes. While the car is soaking, use the Simple Green to work on the heavy deposits. You will want to rinse the car extremely well to avoid a heavy odor later. If you get degreaser on the paint - rinse it. Don't let it sit! I do not spray the sound deadening material under the hood. I wipe this down by hand using a wet towel. I do not recommend lots of water or scrubbing - you'll tear it up!
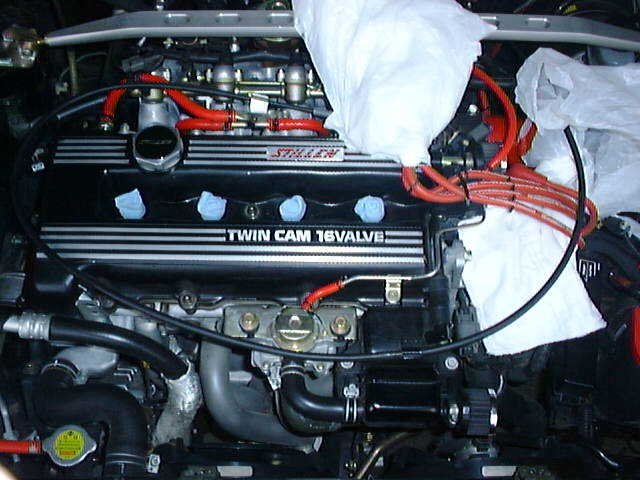
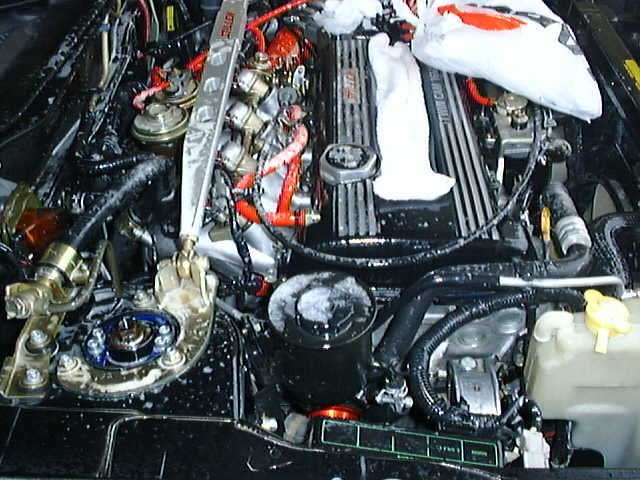
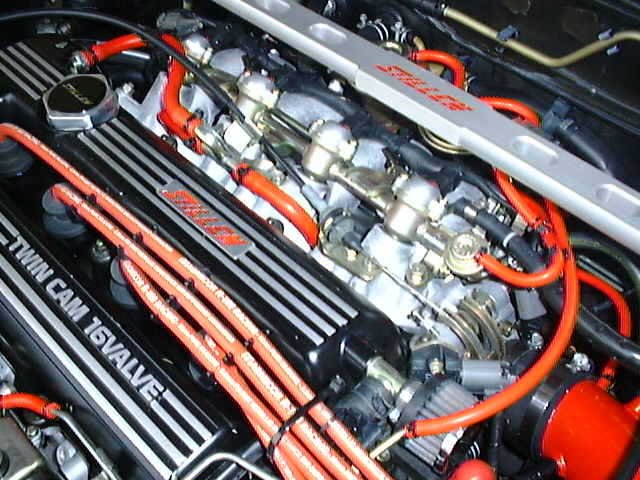
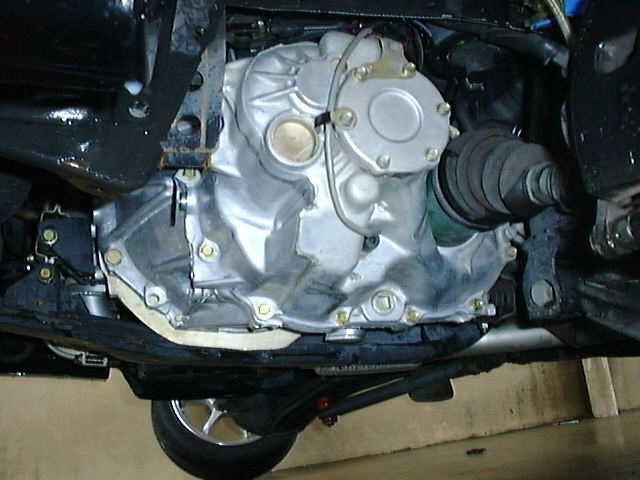
First things first. Make a "tampon" out of a paper towel to put in the spark plug holes. You might want to have some needle nose pliers ready to pull them out. I like the blue shop towel type. Regular paper towels work fine but when they get soggy they tend to tear apart (thus the pliers!). The ignition is now prepped. The ignition cables are wrapped in a towel and then a plastic supermarket shopping bag. Just use the handles from the plastic bag to tie it up. Same procedure applies for the ignition rotor. Pull the plastic snap on cover, towel and bag. Next step is to bag the baby "K&Ns" on the valve cover and EGR. If you have a "POP" charger or intake that has a hi-flow filter under the hood, remove it and bag the intake. Clean the racing filter as directed by the manufacturer. With the wheels off the car you can hit different parts of the engine that otherwise would be inaccessible. This side shows the tranny casing. Engine covered in Foamy Engine Brite. I recommend walking around the car to hit the engine from every angle (same for rinsing the engine). Notice the towel laid across the spark plug holes to make the water and degreaser impact as minimal as possible. Drying the engine
Drying the engine is pretty straightforward. Before starting the car wipe down as much as you can with towels. Now you have to remove all the "prep-work" as previously discussed. Inspect the spark plug holes for water (you might need a flashlight). If there is water in the spark plug wells, blow it out with compressed air or use a vacuum or shop-vac in reverse). I typically give the spark plug well a quick shot of WD-40 to break up any condensation that might be remaining before replacing the plug wires. I let the engine air-dry as I finish washing the rest of the car. You can idle the engine for 5 minutes to warm the engine up to help with the drying process. Keep the hood up so air can circulate. Keep the hood closed and you are going to have a sauna under your hood and condensation!
I have a sealed battery, but if you do not, buy some terminal sealer to spray on the leads to avoid corrosion (Permatex brand works well - sprays purple). Look for collection of water by the fuel rail. The metalwork makes little "cups" for water to sit in - dab with a towel or blow out with compressed air. Shock towers also seem to hold water (unless you have camber plates - then it drains through). Though it is probably overkill, I also spray a little "One-Lube" or WD-40 on the throttle linkage and throttle body actuator and spring. Scrub down those splashguards before putting them back on!
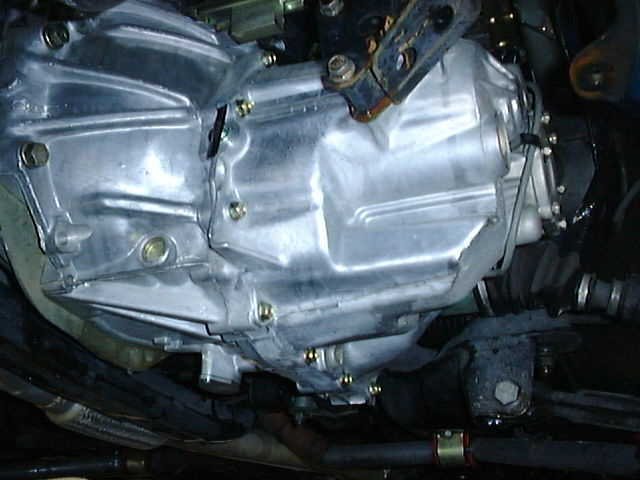
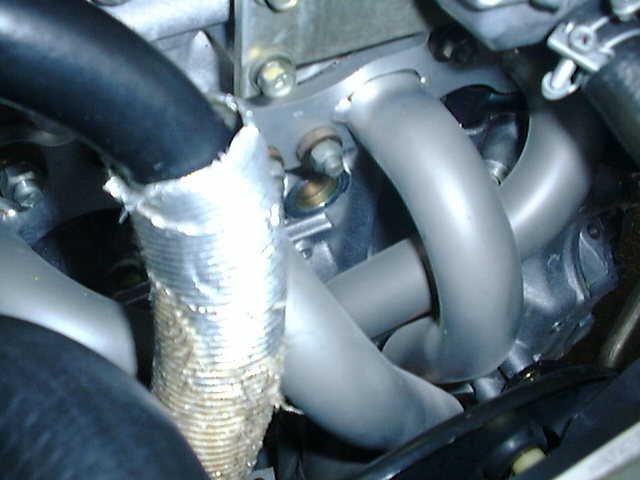
All done and the fuel rail looking good! Upper and lower oil pan clean and looking good! Looking down onto the tranny housing. Does your tranny casing look this good? With the wheel off it is easier to clean the tranny. Detail of the front of the block and header. Pretty crowded picture, but you get the idea. The finished product